Description
This guides the user through creation of a MicroSD image and then initial setup of the Raspberry Pi. It is necessary to have either a wired or WiFi network to complete this guide. Once a well functioning and secure Pi is completed, the user will save the image. Notice that a large part of this guide deals with security. Security is a primary concern when connecting things to the Internet.
Next up?
After reading this guide, you may be interested in reading:
- RPi WiFi Access Point Guide
- Raspberry Tor
- RPi Desktop Mods, Changes to the packages and defaults of the full Raspian
Parts List
- Raspberry Pi 2 or newer
- 4GB (or larger) class 10 MicroSD card
- USB WiFi dongle (optional)
- USB to serial console cable (optional)
Overview
- Download the Raspbian image and write it to the microSD.
- Connect to the Pi.
- Boot the Pi.
- Run the initial setup.
- Connect to the Internet.
- Update and upgrade the Pi.
- Install some network magic.
- Connect to the Pi using SSH.
- Improving security.
- Firewalling with iptables.
- Connect remotely to the Pi's desktop. (optional)
- Advanced network management with nmcli. (optional)
- Adafruit Raspberry Pi repository. (deprecated)
- Node.js. (optional)
- Occidentalis. (deprecated)
- Conclusion.
The estimated time to complete each step is given. This time is for a novice performing the procedures for the first time. If you are familiar with some of the topics or have completed these procedures before, you should expect to use less time.
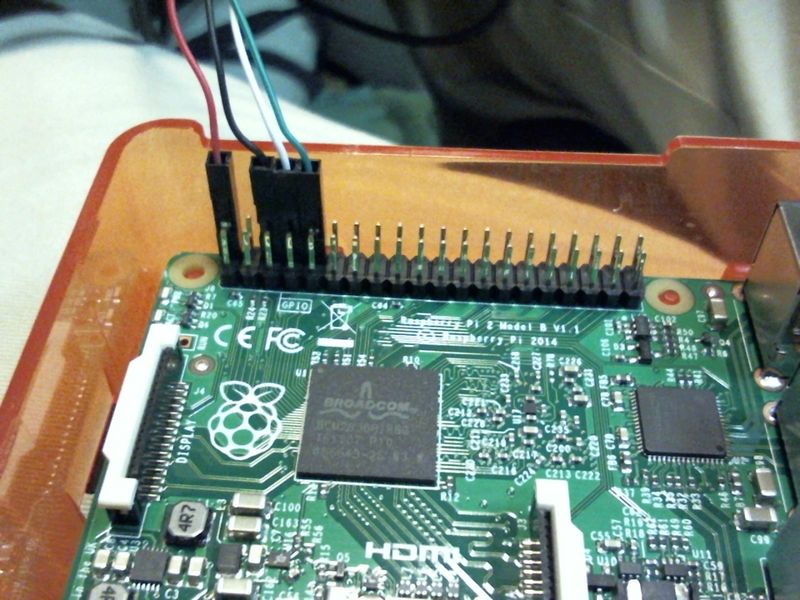
Not sure where things are on your Pi? Review this diagram.
Procedures
Raspbian
Time to complete this is about 1 hour 20 minutes. If you already have an image, the required software, and have done it before it will go much faster.
Download the latest version of Raspbian. For general use, download the full version. If you are certain that you want a headless installation with no GUI desktop, download the Lite version. I usually use the Lite version with no desktop.
For the Lite version, a 4Gb MicroSD is likely sufficient but use at least an 8GB card for the full version. The required size of your disk depends a bit on your expected use. In early 2016, the sweet spot in pricing for these cards is 16GB.
Unzip the image and write it to the MicroSD card. On Windows, I use Win32 Disk Imager. More detailed instructions and instructions for other operating systems may be found on Raspberrypi.org's Installing Images.
Insert the MicroSD into the Pi.
NOTE: Versions of Raspbian later than December 2016 ship with SSH disabled. SSH may be enabled by adding a file named ssh to the boot directory of the SD card. See https://www.raspberrypi.org/blog/a-security-update-for-raspbian-pixel/
Connect to the Pi
Time to complete is about 15 minutes.
From the initial boot, there are three ways to connect to the pi.
- A Raspberry Pi is a computer that may be operated by connecting with a mouse, keyboard, and monitor.
- Using SSH over an Ethernet connection. If you are not familiar with SSH, we will review it later in this guide.
- Often, I find it easiest to connect to it using the USB to Serial console cable. This allows me to use my main computer's equipment while working on the Pi in a terminal window. See the Adafruit overiew for full details on using the USB to console cable.
- If you use the Adafruit guide and wish to install PuTTY, this PuTTY page instead. Also, don't download just the putty.exe but the A Windows installer for everything except PuTTYtel instead.
Boot the Pi
Time to complete is about 5 minutes.
As soon as you insert the USB to console cable into your computer, the Pi will start to boot. If you are using a keyboard and monitor, plug in your power to boot the Pi.
This next set of instructions assumes you are using the USB to console cable.
- Use PuTTY to connect to the serial COM port of the USB connection
- Hit enter to show the login screen
- Login using the default user: pi and the default password: raspberry. (We will change these shortly.)
Hint, putty allows easy copy/paste. To copy from the putty session to the clipboard, just highlight the required text using the mouse. To paste into the putty session from the clipboard, press the Shift and Insert keys.
Run first boot setup
Time to complete is about 10 minutes.
Start the configuration software to expand the filesystem, change the password, and change the hostname. Enter the configuration with this command, sudo raspi-config.
- Select and execute Expand Filesystem
- Select and execute Change User Password
- Select and execute Internationalization Options
- Change Locale to your locale.
- Use spacebar to select/deselect
- Deselect en_GB.UTF-8 UTF-8
- Select en_US.UTF-8 UTF-8
- OK
- Select en_US.UTF-8 UTF-8 as default and then OK
- Change Timezone to UTC.
- Change Locale to your locale.
- Select Advanced Options and select and execute Hostname. Pick a unique and easy to remember hostname. This will be used to connect later.
- Reboot your system
sudo reboot now.
The pi may be shutdown from the command line with, sudo shutdown now. Wait about a minute and remove power.
Connect to the Internet
Time to complete is about 40 minutes.
Ethernet
The easiest way to do this is via Ethernet. Check if you are connected with ifconfig eth. From this output, make note of the inet addr. This is your Pi's IP address.
WiFi
If you do not have an Ethernet connection, you will have to set up your wifi. This procedure assumes you are using a supported wifi USB dongle, are connecting to a simple shared key access point using DHCP, and are not using the GUI desktop to configure your connections. If you are using the full desktop, connect your wifi using the graphical Network Manager. See the Debian wiki for an excellent discussion.
- Before connecting any USB dongle, shutdown the pi
sudo nano /etc/network/interfaces- Find the section within this file starting with
allow hotplug wlan0. Replace that section with the following.
auto wlan0
allow-hotplug wlan0
iface wlan0 inet dhcp
wpa-conf /etc/wpa_supplicant/wpa_supplicant.confCTRL-oto save andCTRL-xto exit.sudo nano /etc/wpa_supplicant/wpa_supplicant.conf- Add the following to this file (remember to change replace your_wifi_identifier and your_wifi_password with your real values):
network={
ssid="your_wifi_identifier"
psk="your_wifi_password"
proto=RSN
key_mgmt=WPA-PSK
pairwise=CCMP
auth_alg=OPEN
}- Try continuing with these setting but make note that you may need to change the proto or key mgmt values depending on your network. See
man wpa_supplicant.conffor more information. - Restart the wifi interface. If your settings are correct, it should automatically connect.
sudo ifdown wlan0
sudo ifup wlan0- Check that you are connected with
ifconfig wlan0. From this output, make note of the inet addr. This is your Pi's IP address. Useiwconfig wlan0to see which Access Point you are connected to.
Update and upgrade
Time to complete is about 5 minutes. This does not include the amount of time required to upgrade. Upgrading your system may take an hour with a slow connection and many upgrades.
It is important to keep your pi's software up to date. This is commonly done using apt-get. The main keywords to know are update, upgrade, install, and remove. So let's make the system current.
- Update the packages list,
sudo apt-get update. - Upgrade software packages to the current version,
sudo apt-get upgrade. - Relax, this might take a while. Maybe grab lunch.
Network magic
Time to complete is about 5 minutes.
This step does nothing more than make it easier to find your Pi on your network. It uses Zeroconf, provided by Avahi on Linux, Bonjour on Windows, and included in Apple.
- Install
sudo apt-get install avahi-daemon. (Note, on recent versions of Raspbian this is already installed and working.) - Your system can now be found at hostname.local, where the hostname is that which you entered back in Run first boot setup.
- For your Windows machine, download and install Bonjour Print Services.
Connect to Pi using SSH
Time to complete is about 30 minutes.
SSH is a safe and efficient way to connect to your Pi over the network or the Internet. It is enabled by default but for highest security, I recommend a few configuration changes and installing your own personal keys. This guide assumes you are connecting from Windows or another Linux system. For Windows use PuTTY and for Linux use OpenSSH. It may be necessary to install PuTTY but OpenSSH comes installed on Linux.
- Verify that SSH is enabled,
sudo raspi-configthen Advanced Options and then SSH. (Note, on recent versions of Raspbian this is enabled by default.)
Browser
If you are using the Chrome browser, there is an app that makes SSH easy. Add to Chrome by visiting the Web Store. Once installed, launch it from the apps page.
- Select a New connection
- In the free form text box enter a name for your pi connection. I usually give it the same name as my pi.
- Username is the user to connect to your pi as. Default it pi
- Hostname is hostname.local or the IP address you made note of earlier.
- Port is 22
- Click Connect
- When done
exit
Windows
- Start puTTY
- Enter hostname.local, where hostname is from Network magic into the Host Name (or IP address) box.
- If you are not able to connect with hostname.local, try connecting using the IP address instead. If this works, then somehow the network magic is being blocked.
- Save the session if you wish.
- The first time you connect, you will get an alert. Click Yes to continue.
- Enter your username, default pi, and password.
- You are now at the CLI prompt of your pi.
- When done, end your session with
exit.
Linux
- Connect using
ssh user@hostname.local, where hostname is from 6 Network magic and the default user is pi. - The first time you connect, you will get an alert. Enter yes to continue.
- You are now at the CLI prompt of your pi.
- When done, end your session with
exit.
A good resource is from archlinux.
Improving security
Some general rules to security are:
- Do not use default passwords
- Use multifactor authentication
- Do not provide shell access unless it is needed
- Do not provide services you do not need
- Do not needlessly expose services
- Apply security patches
- Prevent physical access
- Use quality cryptology
SSHd configuration
Time to complete is about 5 minutes.
There are a few SSHd configuration changes that will improve SSH security. Since SSHd is likely a service you do want to provide and it gives shell access, this is important.
- Edit the configuration file,
sudo nano /etc/ssh/sshd_config Change the following:
PermitRootLogin noAdd the following:
AllowUsers pi
# Even better if you use a non-default user
Additional SSH configuration
SSH is very important for improved security when connecting to your pi. The SSH Hints and Advanced provides guidance to some more advanced SSH settings and methods. Some of these are for improved security and should not be considered optional for an Internet connected device.
Firewall with iptables
(advanced) At this point, your pi is functional, connected, and reasonably secure. It can be made more secure with iptables which will only allow the types of traffic you permit. See RPi iptables sections 1-3, start through Basic rule set.
Connect remotely to the Pi's desktop
Time to complete is about 20 minutes.
Sometimes, it is necessary to view the desktop interface of a Raspberry Pi from a remote location or without an attached keyboard and monitor. Both VNC and RDP are available to help. VNC and RDP are client-server remote desktop protocols.
NetworkManager CLI (advanced)
Moved to RPi NetworkManager CLI.
Add the Adafruit Raspberry Pi repository
(deprecated) See Adafruit Raspberry Pi repository
Install node.js
(optional) Node.js is a JavaScript runtime environment for developing server-side Web applications. It uses an asynchronous event driven framework that is designed to build scalable network applications. I install it on nearly all of my pi to provide a framework for building user interfaces that can actually do something.
Learn more about node from Node.js, Express, Adafruit, and search.
Occidentalis
(deprecated) See Occidentalis
Save the image to a file
Now that you have spent all this time getting your Raspberry Pi set up just so, save it to an image for easy reuse. You will still have to change things like usernames, passwords, and hostnames.
Instead of writing a file image to the MicroSD, use the same software to read the MicroSD to a file image. Then when you are ready to spin up your next pi, it will be as easy as, well, pie.